Roof Repair
Outline:
– Inspection and diagnosis: tracing leaks, safety, and planning
– Steep-slope repairs: asphalt shingles, tile, wood, and slate
– Flat-roof solutions: EPDM, TPO, PVC, and modified bitumen
– Flashing, vents, valleys, and edges: details that keep water out
– Prevention, budgeting, and when to DIY or call a pro
Introduction
From the street, a roof is a quiet silhouette; up close, it’s a weather system manager, a thermal shield, and a guardian of every object below. Roof repair matters because water moves with persistence, and small gaps can multiply into stained ceilings, ruined insulation, and damaged sheathing. A thoughtful approach saves time and money: investigate first, choose materials that match the roof type, execute clean details, and verify the fix after rain. Whether you’re tackling a single lifted shingle or planning a weekend of flashing upgrades, the techniques below emphasize safety, durable materials, and practical decision-making. If you prefer to hire help, understanding the process equips you to ask better questions and compare quotes on equal footing.
Inspection and Diagnosis: Finding the Source Before You Fix
Effective roof repair starts with a disciplined inspection. Water rarely enters at the stain you see on drywall; it may travel along rafters, decking seams, or underlayment before showing itself indoors. Begin outside only if conditions are safe: dry weather, stable ladder footing, and proper fall protection if you’re stepping onto the roof. Indoors, use a flashlight to examine the attic. You’re looking for dark streaks, rusted fasteners, compressed or damp insulation, and daylight where it shouldn’t be. A moisture meter can help distinguish new leaks from old, dried ones. Mark suspect areas with painter’s tape so you can correlate attic evidence to exterior locations later.
High-risk zones deserve special attention because they account for a large share of leaks on both steep-slope and low-slope roofs:
– Penetrations: plumbing vents, exhaust fans, satellite mounts, and skylight curbs
– Transitions: walls meeting roof planes, chimneys, and step flashing areas
– Valleys and eaves: where water volume concentrates or ice dams form
– Ridges and hips: wind-driven rain can backflow under caps
– Edges and gutters: overflowing gutters can back up under shingles or membranes
Build a simple toolkit to inspect efficiently:
– Safety: non-slip footwear, gloves, eye protection, and a rated harness on steep slopes
– Access: Type I or IA ladder, stabilizer arms, and a helper to foot the ladder
– Assessment: flashlight, chalk, moisture meter, tape measure, and binoculars or a camera with zoom
– Temporary control: blue tarp, plastic sheeting, and tape for emergency mitigation
Outside, photograph every suspect area before touching anything. Granule piles in gutters suggest shingle wear; oxidized streaks reveal aging metal; cracks around vent boots hint at UV fatigue. On flat roofs, note ponding rings after rain and check seams for lifting. If a leak only appears during wind-driven storms, examine uphill obstructions that might redirect water. Sketch a simple roof map tying attic marks to exterior features. With evidence assembled, define a targeted repair plan: what to remove, what to replace, and how to verify the result in the next storm. Diagnosis done well is half the repair.
Steep-Slope Repairs: Asphalt Shingles, Tile, Wood, and Slate
Steep-slope roofs (generally 4:12 pitch and above) rely on overlapping layers to shed water. Asphalt shingles are common, but tile, wood, and slate each demand a tailored approach. A universal principle applies: replace damaged components in kind, maintain overlap patterns, and seal only where the system is designed to accept sealant. Over-sealing can trap moisture and accelerate deterioration, while underlayment details keep minor wind-driven rain from reaching the deck.
Asphalt shingle replacement follows a predictable sequence. Slide a flat pry bar carefully under the shingle above the damaged one to break the sealant strip, lifting only enough to expose the nails. Loosen nails on the damaged shingle and the one above that overlaps it, then slide the damaged shingle out. Insert a new shingle of matching weight and exposure, align the butt line, and nail in the manufacturer’s pattern (often four to six nails per shingle, never in the adhesive strip). Re-seal tabs on a warm day so the adhesive bonds; in cooler weather, a small dab of compatible roofing cement under each tab helps. Address nail pops by lifting tabs, extracting the misdriven nail, fastening a new nail slightly upslope, and sealing the hole.
Tile, wood, and slate bring different tactics. A cracked concrete or clay tile near the field can often be swapped by breaking the damaged piece carefully and sliding in a new one with a clip or bead of compatible adhesive, avoiding foam or mortar that blocks water paths. Wood shakes split with age; replace by cutting out the failed piece and sliding in a new shake with a shield (a thin metal or membrane slip) above the joint to redirect water. Slate repairs typically use a slate ripper to pull hidden nails and a hook system or stainless nail and bib flashing to secure the replacement without exposing fasteners.
Plan materials and precautions:
– Match thickness and exposure to maintain smooth water flow
– Use corrosion-resistant fasteners appropriate to your climate
– Replace torn or wrinkled underlayment patches as you go
– Protect adjacent pieces; brittle tiles and aging shingles crack if levered too far
Common missteps to avoid:
– Gluing shingles into a continuous sheet that defeats staggered laps
– Driving nails diagonally or overdriving them, which cuts the mat
– Ignoring attic ventilation; heat buildup bakes shingles and curls wood
– Neglecting ridge caps; wind can lift a loose cap and start a cascade
When repair areas multiply or materials are nearing the end of their service life (asphalt often 20–30 years, wood 20–40 with care, tile and slate much longer), it may be more economical to plan sectional re-roofing. Local costs vary widely, but many small steep-slope repairs fall in the few-hundred- to low-thousand-dollar range, depending on access and material type.
Flat-Roof Solutions: EPDM, TPO, PVC, and Modified Bitumen
Low-slope roofs manage water differently; they rely on continuous membranes, robust seams, and positive drainage. Common materials include EPDM (synthetic rubber), TPO and PVC (thermoplastics), and modified bitumen (asphalt with reinforcing). Failures tend to cluster at seams, terminations, penetrations, and areas of ponding. Before any repair, sweep debris, remove loose sediment, and allow the surface to dry. Mark blisters, fish-mouths, lifted laps, and punctures. If ponding persists for more than 48 hours after rain, a drainage or tapered insulation solution may be needed to preserve repairs.
Membrane patching shares core steps across systems: clean, prepare, patch, and roll. For EPDM, wash the area with a membrane cleaner, scuff lightly to open the surface, apply primer, then install a compatible self-adhered patch with rounded corners, rolling firmly with a silicone roller to expel air. TPO and PVC often require heat-welded patches; cleanliness is crucial, and temperature windows matter, so practice on scrap to dial in technique. Modified bitumen patches can be cold-applied or torch-applied; if you lack experience with open flame, choose cold process for safety, bonding a cap sheet patch over a base ply that extends beyond the damaged zone.
Penetrations demand robust terminations. Use pipe boots compatible with the membrane type and diameter, secure with clamping bands where required, and seal with manufacturer-specified sealant. At parapet walls, ensure base flashing rises sufficiently above the roof plane and that counterflashing laps correctly. Edge details should include metal drip edges with continuous cleats and secure terminations. Where foot traffic is frequent, install walkway pads to reduce scuffing and punctures.
A practical checklist before calling the repair done:
– Verify patches extend well beyond the damage with smooth, fully bonded edges
– Probe seams gently after cooling to find voids before water does
– Revisit after the next storm to confirm performance
– Document with photos for maintenance history and warranty records
Flat-roof lifespans vary—often 15–25 years for single-ply and modified systems—depending on UV exposure, drainage, and maintenance. Targeted repairs can add years, but if patches begin to overlap patches, efficiency drops and full resurfacing may be more sensible. Expect small membrane repairs to range from modest DIY material costs to professional invoices that reflect access, safety setup, and the expertise to weld or adhere reliably.
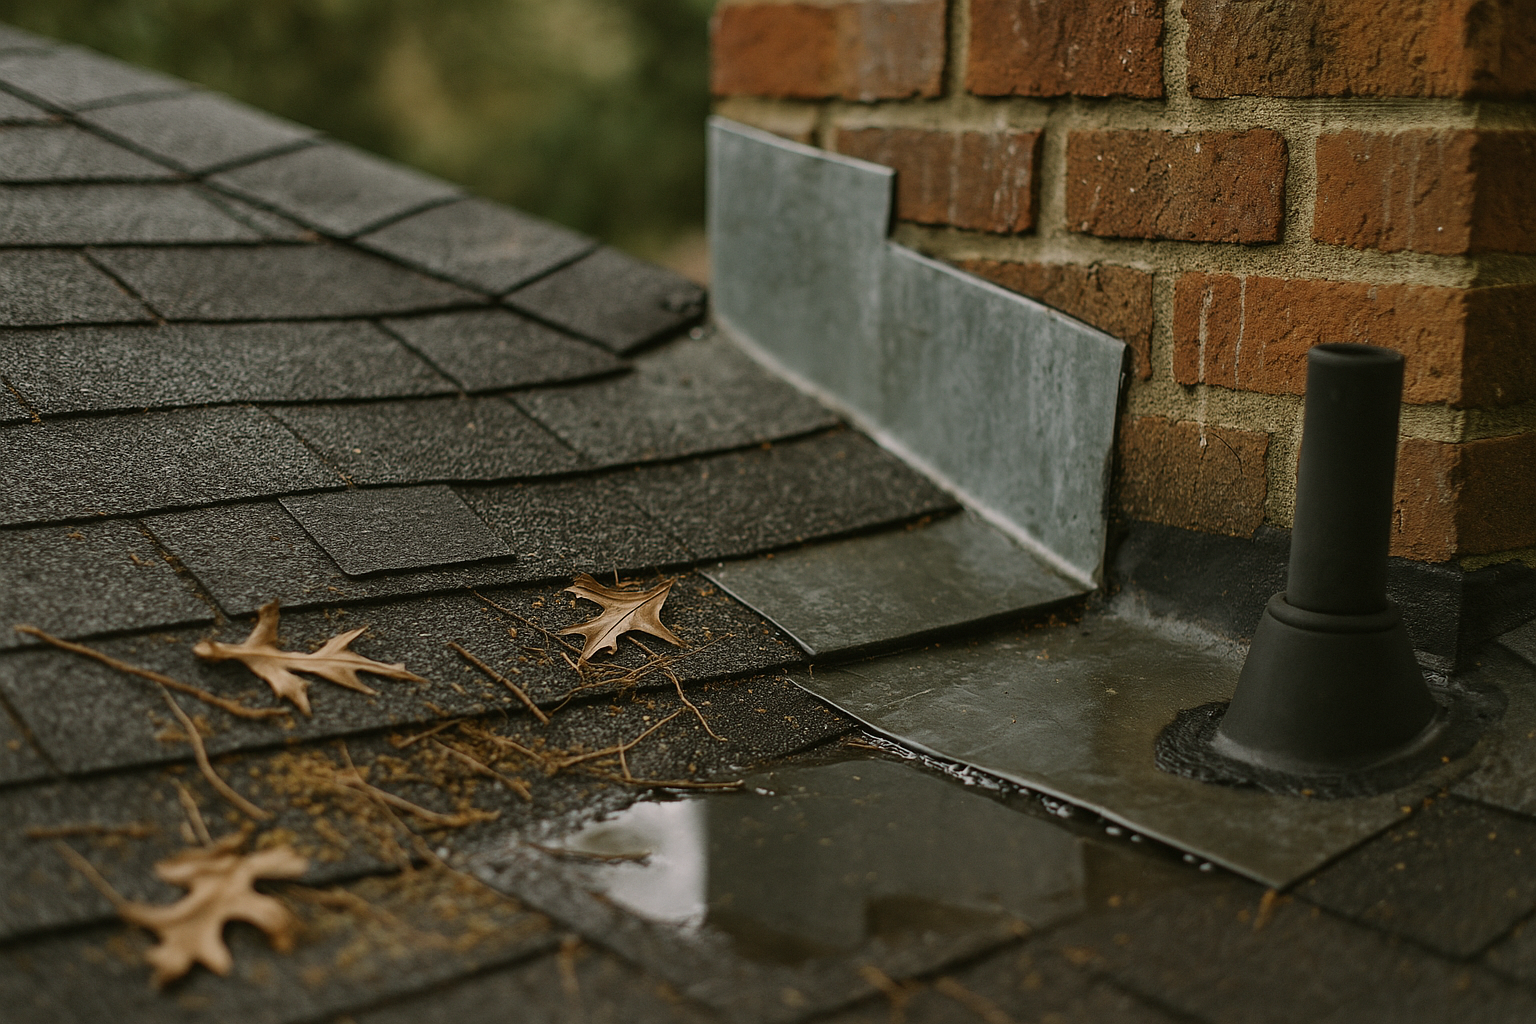
Details That Keep Water Out: Flashing, Vents, Valleys, and Edges
Most chronic leaks trace back to details rather than field materials. Flashing is the choreography that makes different planes, textures, and materials act like a single, watertight surface. Step flashing along sidewalls works as a series of shingles made of metal or formed membrane: each piece laps the shingle below and tucks behind the siding or under a counterflashing. Replacing failed caulk without correcting laps is a temporary bandage; the durable fix restores the layered pathway water expects.
Around chimneys, use a base flashing with saddle or back pan upslope, step flashing along the sides, and counterflashing reglet-cut into masonry. Counterflashing should overlap step flashing sufficiently to shed wind-driven rain. If mortar joints are eroded, re-point before installing counterflashing. Skylights demand sound curb flashing and, on steep slopes, a head flashing that lifts water over the uphill edge. Preformed kits can work well when installed to spec, but verify that curb heights clear anticipated snow and leaf buildup.
Valleys concentrate water. On steep slopes, an open metal valley with a slight center rib sheds debris effectively, while a closed-cut valley offers a cleaner look but relies heavily on precise shingle cuts and underlayment. If you’re repairing a valley, extend underlayment (such as a self-adhered ice and water barrier) sufficiently under both planes and ensure the metal, if used, is secured with concealed fasteners outside the primary water channel.
Edge protection is the first and last line of defense. Drip edge metal should run along eaves and rakes, underlayment should lap properly, and shingles should not overhang so far that wind snaps them or water wicks backward. Vents and pipe penetrations need intact boots; UV-cracked collars are frequent culprits. Replace boots that have hardened or split, and bed flanges in compatible sealant only where specified—avoid smearing sealant as a substitute for correct laps.
Watch for these red flags at details:
– Stained sheathing or rust prints around flashing pieces
– Sealant-only “fixes” where step flashing should interlace
– Mitered valley joints with exposed fasteners in the flow line
– Short counterflashing that ends inside mortar rather than lapping over base flashing
Detail work takes patience and a willingness to undo prior shortcuts. When repaired with correct overlaps, fastening patterns, and clearance for debris, these intersections turn from chronic troublemakers into quiet performers that outlast the surrounding field.
Prevention, Budgeting, and When to DIY or Call a Pro
A strong repair is half the story; the rest is prevention and smart planning. Start with a seasonal routine: clear gutters and downspouts, trim back branches, and sweep off debris after storms. Moss and algae hold moisture and lift edges; use gentle, roof-safe cleaners and avoid aggressive pressure washing that strips granules or scars membranes. In snowy climates, reduce ice dam risk with adequate attic insulation and balanced ventilation so meltwater doesn’t refreeze at eaves. Inside, watch humidity; bathroom fans should vent outdoors, not into the attic, and air sealing around ceiling penetrations helps keep warm, moist air where it belongs.
Budgeting is simpler when you track the roof like any other asset. Note installation year and material type, then plan for:
– Annual maintenance: small fixes and cleaning
– Midlife tune-ups: sealing minor splits, replacing boots, tightening ridge and hip caps
– End-of-life work: sectional replacements or a full overlay/tear-off depending on condition
Approximate ranges vary by region and access, but many homeowners see:
– Minor repairs (single shingle swap, small membrane patch): typically a few hundred dollars
– Moderate repairs (valley section rebuild, multiple boot replacements): higher hundreds to low thousands
– Larger projects (partial re-roof, extensive membrane detailing): several thousands and up
Material choice, roof height, pitch, and complexity all influence labor and safety setup.
Decide when to DIY by weighing risk, scope, and warranty. Tasks suited to capable homeowners include replacing a damaged shingle, swapping a cracked vent boot, securing a small membrane patch, or installing gutter guards. Call a qualified roofer for steep or high roofs, chimney and skylight flashing, heat-welded single-ply work, structural decking repairs, and anything that requires specialized equipment. If a storm tears off sections or drives water indoors, a temporary tarp secured at ridges and anchored past the eaves can limit damage until permanent repairs are made. Document damage with photos and notes immediately; insurers and contractors alike appreciate clear records.
Finally, think beyond water: good roofs manage heat and airflow. Proper ventilation reduces summertime attic temperatures and limits condensation in winter. A well-detailed roof, supported by consistent maintenance and realistic budgeting, saves energy, protects finishes, and preserves resale value. The payoff is quiet but tangible every time it rains.
Conclusion: Build a Roof Repair Plan You Can Trust
Roof repair isn’t a mystery; it’s a sequence. Inspect carefully, choose techniques matched to your roof type, give extra respect to flashing and valleys, and maintain the system with small, regular actions. When the task exceeds your ladder comfort or tooling, hire a reputable pro and use this guide to align expectations. Clear plans keep water out, control costs, and return your roof to doing its silent, essential job.